How about a nice GUI that lets you select the time to which you want to restore all your available backups in sequence in one go. A TIMELINE of restoration points. That would be fantastic and that is what SQL server 2012 has introduced. Point in time recovery via the TIMELINE feature. Let us understand this feature with an example.
I have created a database called MyDB which I will restore to a point in time. I have kept the DB in full recovery mode. The following backups have been taken.
1) 1 full backup
2) 1 Diff backup
3) 5 t-log backups
Snapshot of the backups
 Now lets recover this database to a point in time from the available backup via TIMELINE option.
Step 1: Right click on the database -> Tasks-> restore -> database
 Step 2: select device. Give a new name to the restored DB
 Step 3: Click on the add button and select all the backup files
 Step 4: Click on ok and you will see the below screen. Observe the option restore to

 Step 5: Lets click on TIMELINE button and this is what you will see
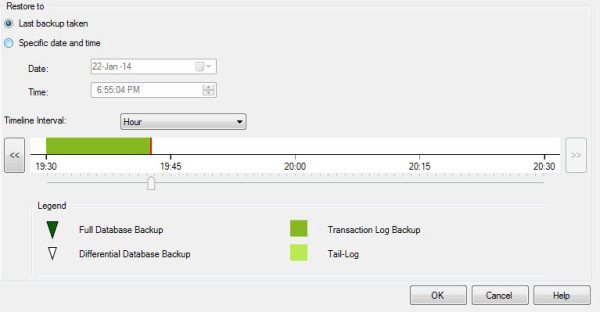 Step 6: Select the option -> Specific date and time. Once you do that you will be able to move the scroll bar to any time highlighted in green. In tis case i have moved it to 6:02:03 PM. This is the time i would like to have my DB restored to. Click on OK.
 Once you click on OK, you will find the below screen with the required backup only. Also observe that a tail log backup will also be taken.
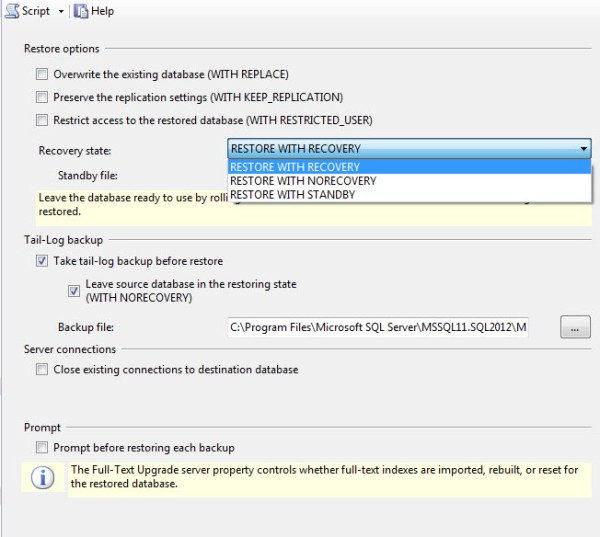
 Step 7: Click on options tab. We will go with restore with recovery. Click on OK
 Once you click on OK you will find the db restored with recovery to the name given above
1) 1 full backup
2) 1 Diff backup
3) 5 t-log backups
Snapshot of the backups
 Now lets recover this database to a point in time from the available backup via TIMELINE option.
Step 1: Right click on the database -> Tasks-> restore -> database
 Step 2: select device. Give a new name to the restored DB
 Step 3: Click on the add button and select all the backup files
 Step 4: Click on ok and you will see the below screen. Observe the option restore to
 Step 5: Lets click on TIMELINE button and this is what you will see
 Step 6: Select the option -> Specific date and time. Once you do that you will be able to move the scroll bar to any time highlighted in green. In tis case i have moved it to 6:02:03 PM. This is the time i would like to have my DB restored to. Click on OK.
 Once you click on OK, you will find the below screen with the required backup only. Also observe that a tail log backup will also be taken.
 Step 7: Click on options tab. We will go with restore with recovery. Click on OK
 Once you click on OK you will find the db restored with recovery to the name given above
No comments:
Post a Comment